Organize segments with folders
As your list of segments grows, folders keep it navigable. Group segments by team, campaign, or event series, and nest folders up to five levels deep.
Who this is for
Teams with more than a handful of segments who want a shared, predictable structure.
Quick steps
- Open CRM > Segments and switch to the Folders view.
- Click New folder, name it, and optionally pick a parent folder.
- File segments with Move to folder from a segment's row menu.
Step-by-step walkthrough
1. Switch to the Folders view
The segments dashboard has two views, Segments and Folders, switched from the menu at the top of the page. The Folders view shows a tree you can drill into, with columns for Name, Type, Size, Object, and Last updated. Folder rows show how many segments they contain; segment rows show their member count.
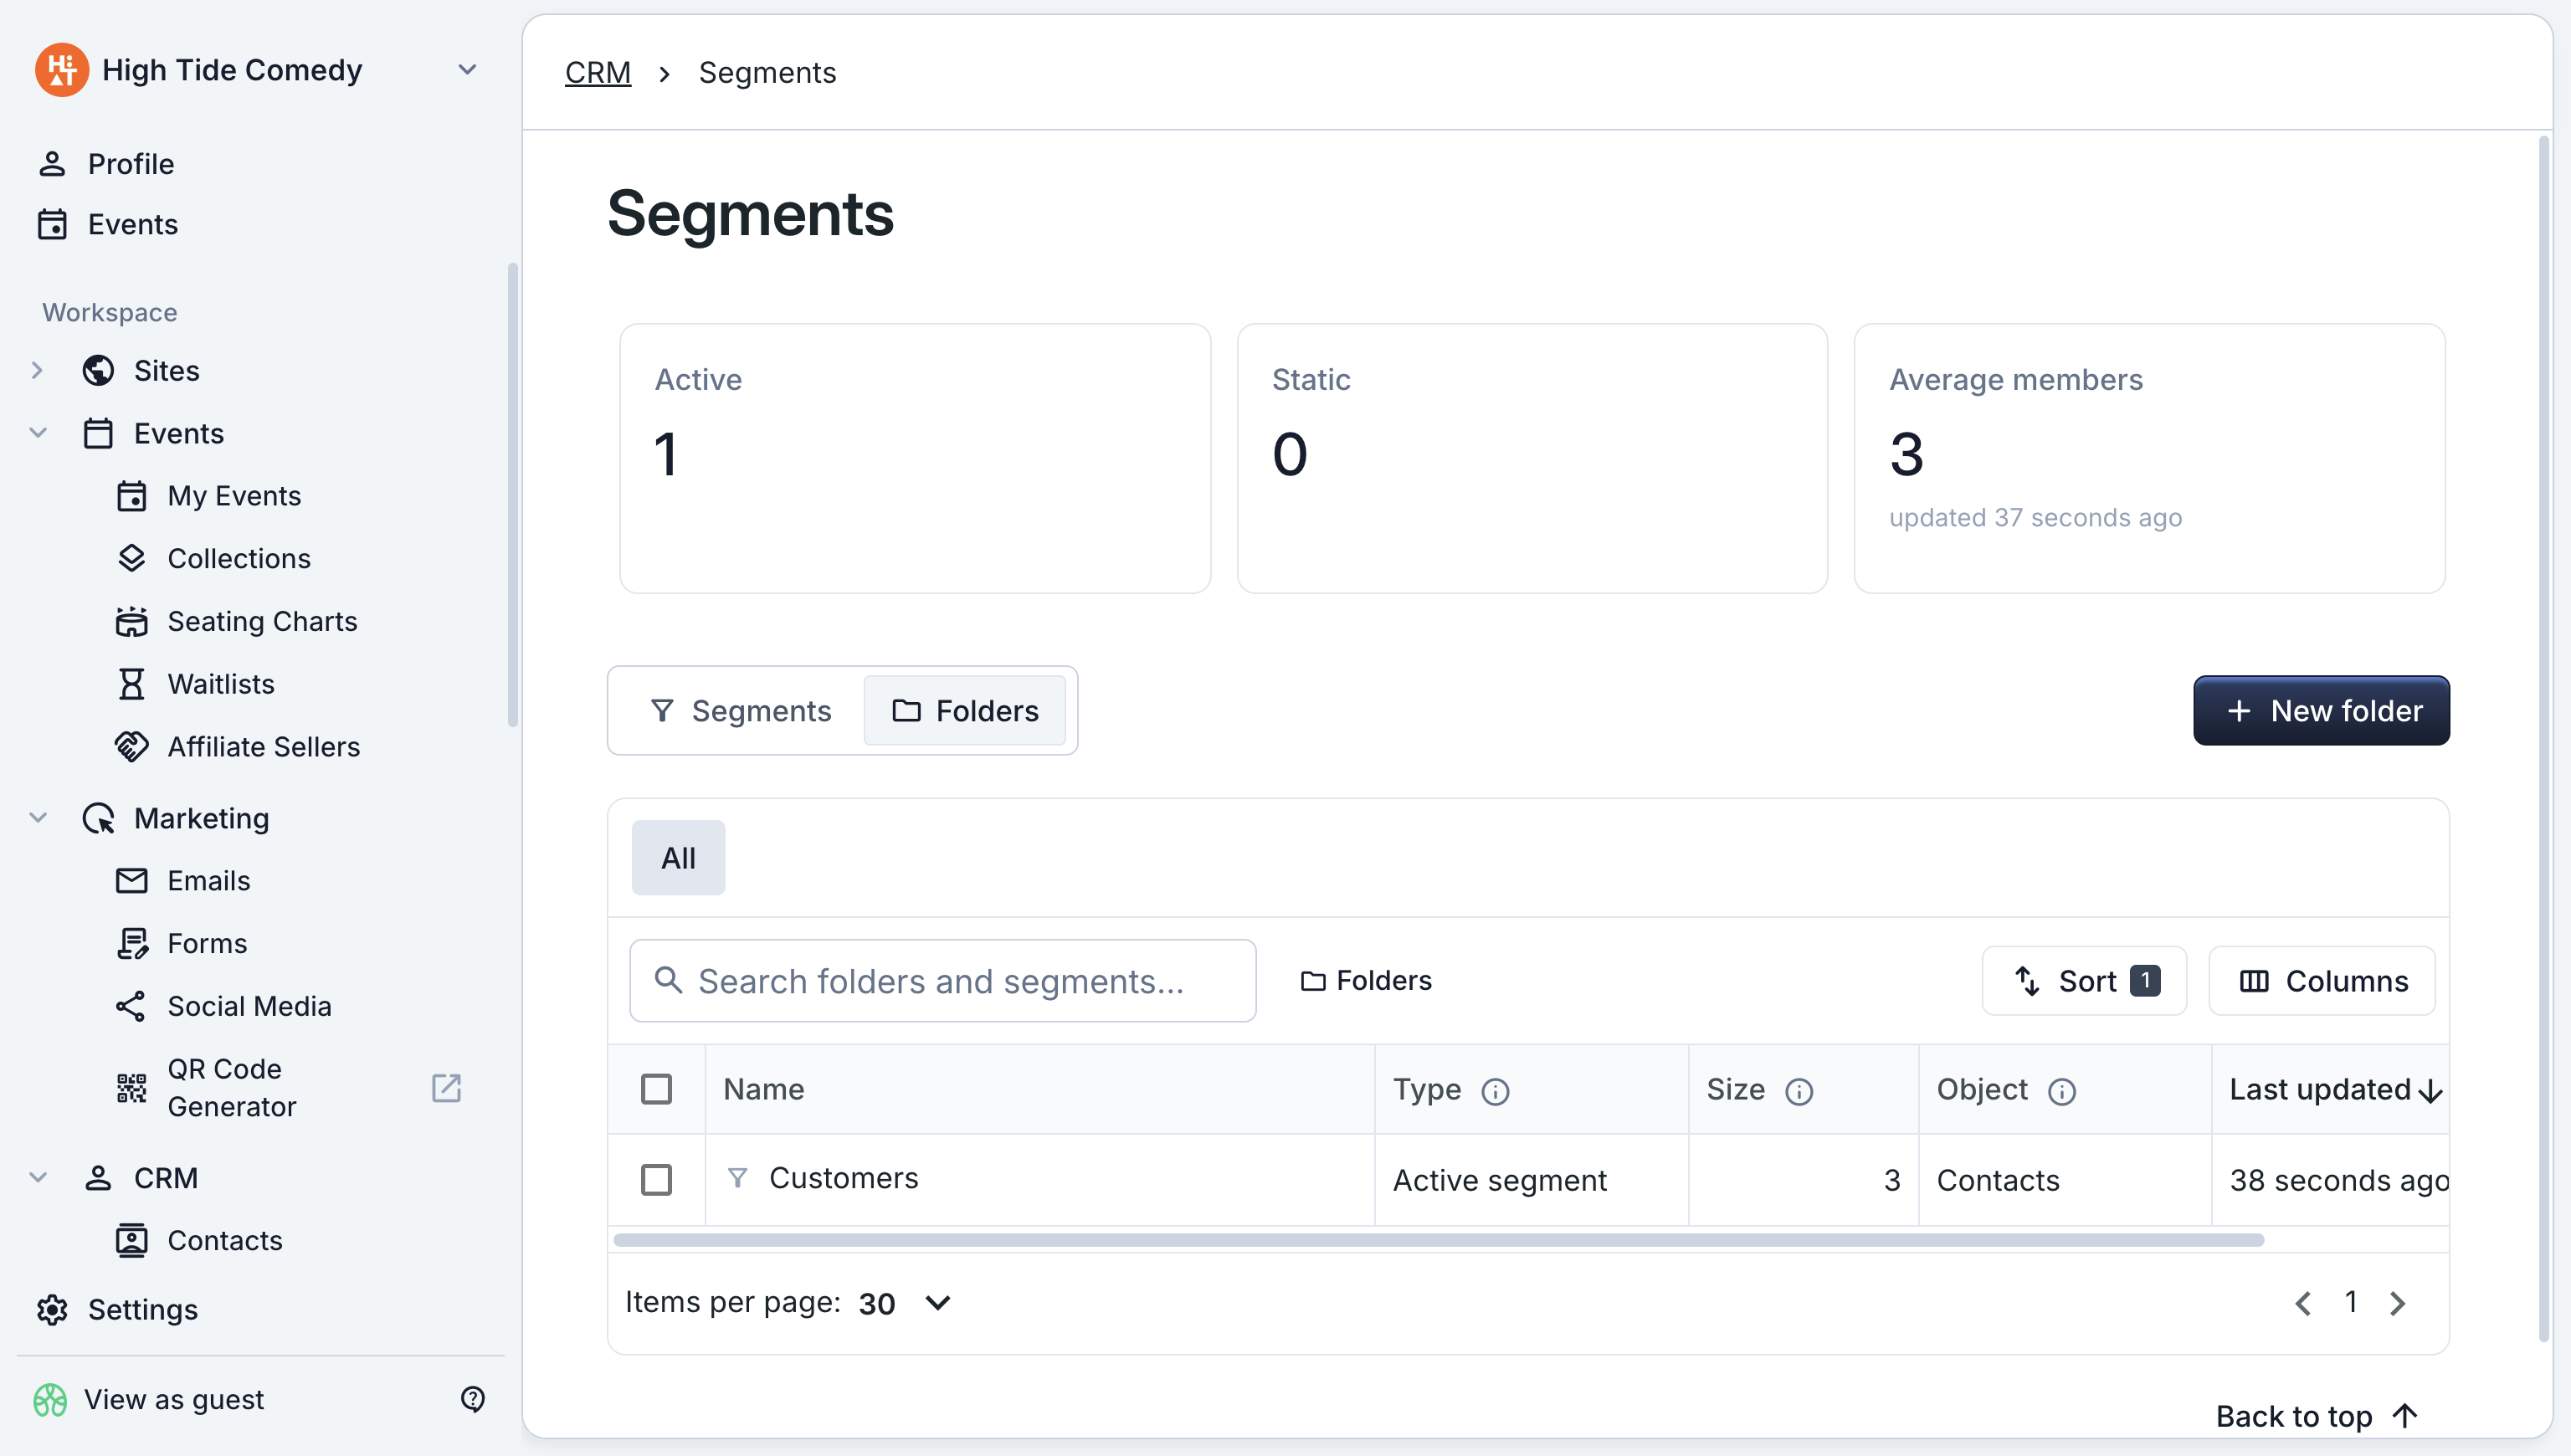
2. Create a folder
- In the Folders view, click New folder.
- Enter a Folder name, for example
VIP customers. - Optionally choose a Parent folder to nest it. Folders can nest up to 5 levels deep.
- Click Create folder.
3. File a segment into a folder
- Open the row menu on any segment (in either view).
- Choose Move to folder.
- Pick the destination folder, or detach the segment back to the workspace root.
4. Rename, move, or delete a folder
Each folder's row menu offers:
- Rename folder: change the name in place.
- Move folder: pick a new parent folder.
- Delete folder: only empty folders can be deleted. Move any contained segments out first.
Troubleshooting
I can't delete a folder
Non-empty folders can't be deleted. Open the folder, move its segments (and subfolders) elsewhere, then delete it.
I can't nest a folder where I want
Folders can nest at most 5 levels deep, and a folder can't be moved into one of its own subfolders.