Finalize and Send
Finalizing turns a draft into an issued invoice. 3Common assigns the invoice number, generates a PDF, optionally emails the customer with a payment link, and (if you opt in) auto-charges a card on file.
Who this is for
Hosts who have a draft ready and want to issue it to the customer.
Quick steps
- Open the draft from the dashboard.
- Confirm the customer email is correct.
- Choose how to collect payment — manual link or auto-charge a saved card.
- Click Finalize and send.
That's it. The customer receives the invoice email immediately, and your dashboard updates to show the issued invoice.
What finalizing actually does
Finalizing isn't reversible. When you click Finalize and send, 3Common does five things in order:
- Assigns the next invoice number from your account's counter.
- Stamps the issue date (right now).
- Locks the line items, customer, tax, and total. The invoice becomes immutable from this point — to change anything, use revise and reissue.
- Generates the invoice PDF and stores it. The PDF is available to download from the dashboard or the customer's payment page.
- Sends the customer email (if you provided a customer email and didn't opt out) with the PDF attached and a payment link.
If you opted into auto-charge, an additional step runs: 3Common charges the customer's saved card on file. On success, the invoice goes straight to Paid and the customer receives a receipt email instead of a payment-link email. On decline, the invoice goes to Payment failed and the customer receives the payment-link email so they can pay manually.
Auto-charge vs. manual payment
You can pick how the customer pays right before finalizing.
Manual payment link (default)
The customer receives the invoice email with a Pay button. Clicking the button opens their payment page where they enter card details and submit. You don't need to do anything else — the invoice updates automatically when payment clears.
This is the default and works for any customer (returning or new).
Auto-charge a saved card
If the customer has a card on file from a previous purchase, you can auto-charge the moment you finalize. No customer interaction — the charge runs server-side, and the customer just gets a receipt email confirming the payment.
Use auto-charge when:
- The customer agreed in advance to be charged (a recurring sponsor, a known returning client, an authorized rep).
- You want a one-click experience for a customer who has paid you before.
Skip auto-charge when:
- The customer hasn't authorized the charge.
- This is the first time the customer is paying you (they have no card on file).
- You're collecting a deposit or partial payment where the customer wants to review the invoice first.
What happens if the auto-charge fails?
The invoice moves to Payment failed and the customer automatically receives the payment-link email so they can pay manually. You can also retry the charge from the dashboard side-peek — see the dashboard guide.
Step-by-step walkthrough
1. Open the draft
From the Invoices dashboard, click the draft row to open the side-peek. The side-peek shows the customer, line items, total, and the actions you can take.
If you haven't created a draft yet, see Create an invoice.
2. Confirm the customer email
The customer email is shown at the top of the side-peek. If it's empty or wrong, edit the contact from the customer's profile page — the next time you reopen the draft it'll pick up the corrected email. (The email lives on the contact, not on the draft itself, until the moment you finalize.)
If the customer email is empty when you finalize, no invoice email is sent. The invoice still gets a number and a PDF, but the customer has no way to pay until you share the link manually.
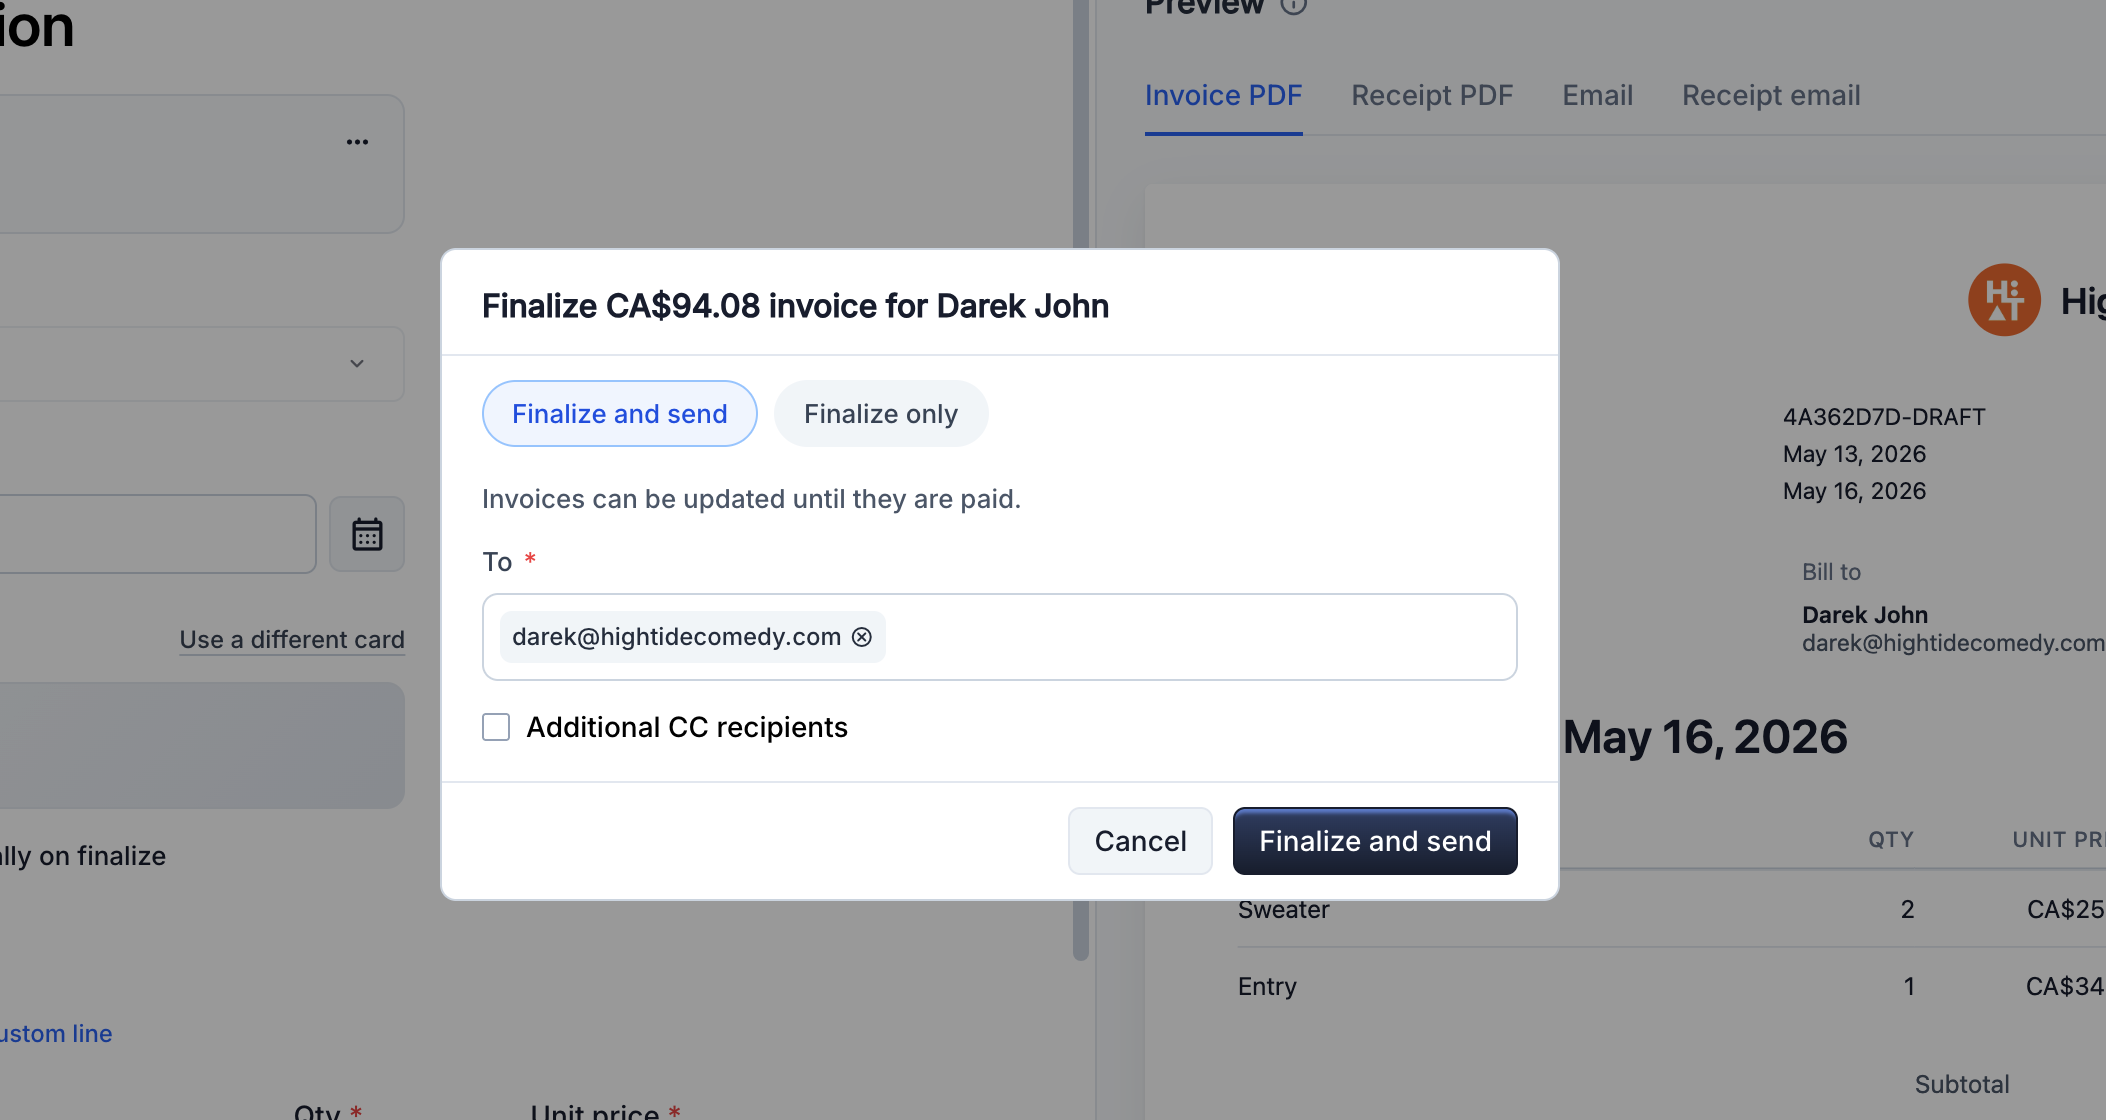
3. Choose the payment method
In the side-peek, click Finalize and send. The confirmation dialog asks how you want to collect.
- Email a payment link (default) — the customer pays manually.
- Auto-charge their saved card — runs the charge immediately. Only available when the customer has a card on file.
4. Confirm
Click Confirm to finalize. You'll see the status chip update in real time:
- Manual payment path: status goes Draft → Open.
- Auto-charge success path: status goes Draft → Open → Paid.
- Auto-charge failure path: status goes Draft → Open → Payment failed.
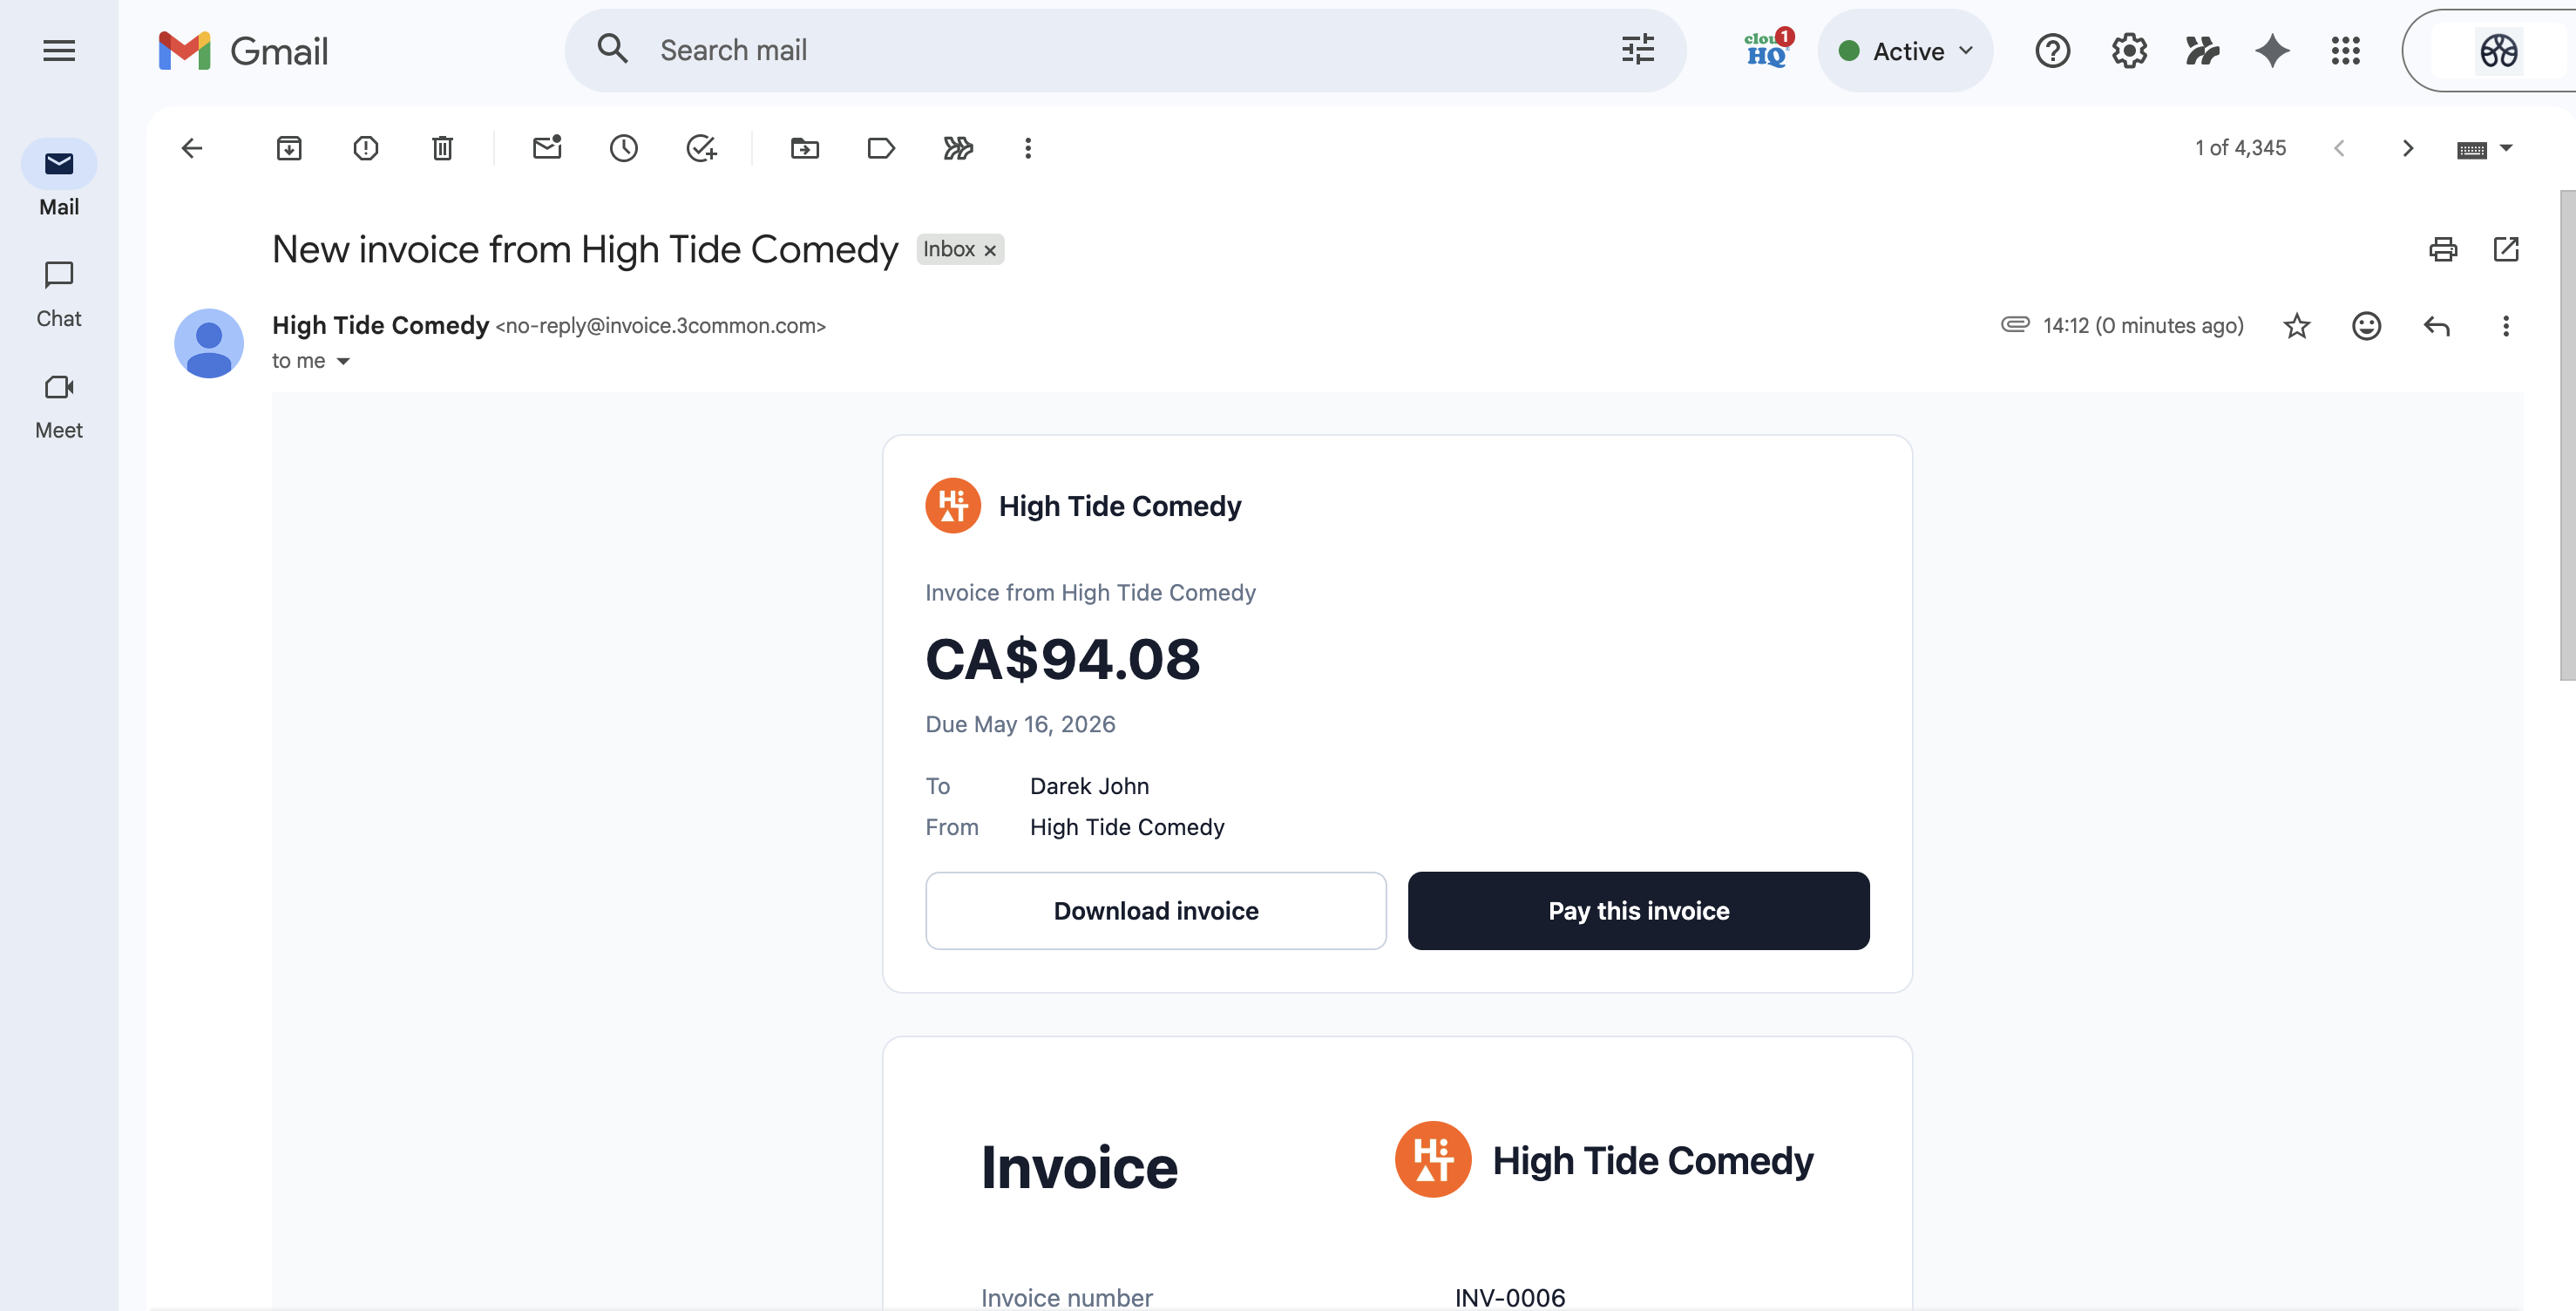
What the customer sees
Right after finalize, the customer receives an email. The shape depends on which payment path you chose.
| Path | Email subject | Email body |
|---|---|---|
| Manual link | Invoice {number} from {your business} |
Amount due, a Pay button linking to the payment page, a Download invoice button, and the invoice PDF attached. |
| Auto-charge success | Payment Receipt — {receipt#} from {your business} |
Amount paid, payment date, Download invoice + Download receipt + (if applicable) Download tickets. |
| Auto-charge failure | Invoice {number} from {your business} |
Same as the manual-link email — payment failed silently, so the customer just sees an invoice waiting to be paid. |
For the full tour of the customer-facing surface, see Customer experience.
Re-sending the invoice email
If the customer says they never received the email, you can resend it from the dashboard:
- Open the invoice's side-peek.
- Click Resend invoice email from the action menu.
The same email goes out again to the same address with the same PDF attached. The invoice's status doesn't change.
Tickets and fulfillment
If any line item is a ticket product (or a bundle containing tickets), fulfillment runs automatically the moment the invoice transitions to Paid. The customer's receipt email arrives with the tickets PDF attached — one printable card per ticket, including QR codes.
You don't have to do anything separately to issue tickets; finalize the invoice, the customer pays, and the tickets are in their inbox within seconds.
Troubleshooting
I can't click Finalize — the button is disabled
The most common reasons:
- No line items. Add at least one line.
- Total is below the minimum. Charges have to be either $0.00 or at least $1.50 USD equivalent. Adjust the line amounts.
- Customer is missing required info. The contact needs at least a name and email to receive the invoice email.
The auto-charge option is grayed out
Auto-charge is only available when the customer has a card on file from a previous purchase. If this is their first time paying you, use the manual payment link path; the customer enters their card when they pay, and that card becomes available for auto-charge on future invoices.
The invoice was sent but my customer hasn't received it
Check:
- The customer email field on the contact. Typos are the most common cause.
- Their spam folder. First-time senders sometimes land there.
- Your account's verified sender domain. If you've set up a custom sender, make sure DNS records (SPF, DKIM) are configured per the setup guide.
You can resend the email from the side-peek without changing the invoice's state.
The customer wants to pay by check / wire / cash
The invoice's payment page is online-only. For other payment methods, share the invoice PDF directly with the customer and track payment outside 3Common. When the funds arrive, open the side-peek and use Mark as paid to record the payment manually. The invoice transitions to Paid and the customer receives a receipt email.
Can I finalize without sending an email?
Yes — set the customer email to blank or uncheck the "Send invoice email" option in the finalize dialog. The invoice is issued with a number and PDF; you can share the payment page URL manually.