Create a segment
Build a reusable group of contacts with the segment creation wizard. You choose what the segment groups, whether it updates itself, and which contacts belong in it.
Who this is for
Hosts and team members who want reusable, targeted contact groups for campaigns, workflows, and analysis.
Quick steps
- Open CRM > Segments and click New segment.
- Pick Contacts as the record type.
- Choose a kind: Active (updates automatically) or Static (frozen snapshot).
- Name the segment and optionally pick a folder.
- Build the filter and check the live preview.
- Review your choices and click Create segment.
Step-by-step walkthrough
1. Start the wizard
- Go to host.3common.com.
- Open CRM > Segments in the left navigation.
- Click New segment.
2. Choose what the segment groups
The Target step asks "What kind of records does this segment group?"
- Select the Contacts card: "Group your CRM contacts by their properties or activity."
Selecting a card advances you to the next step automatically. Other record types are planned and appear with a Soon badge.
3. Choose a kind
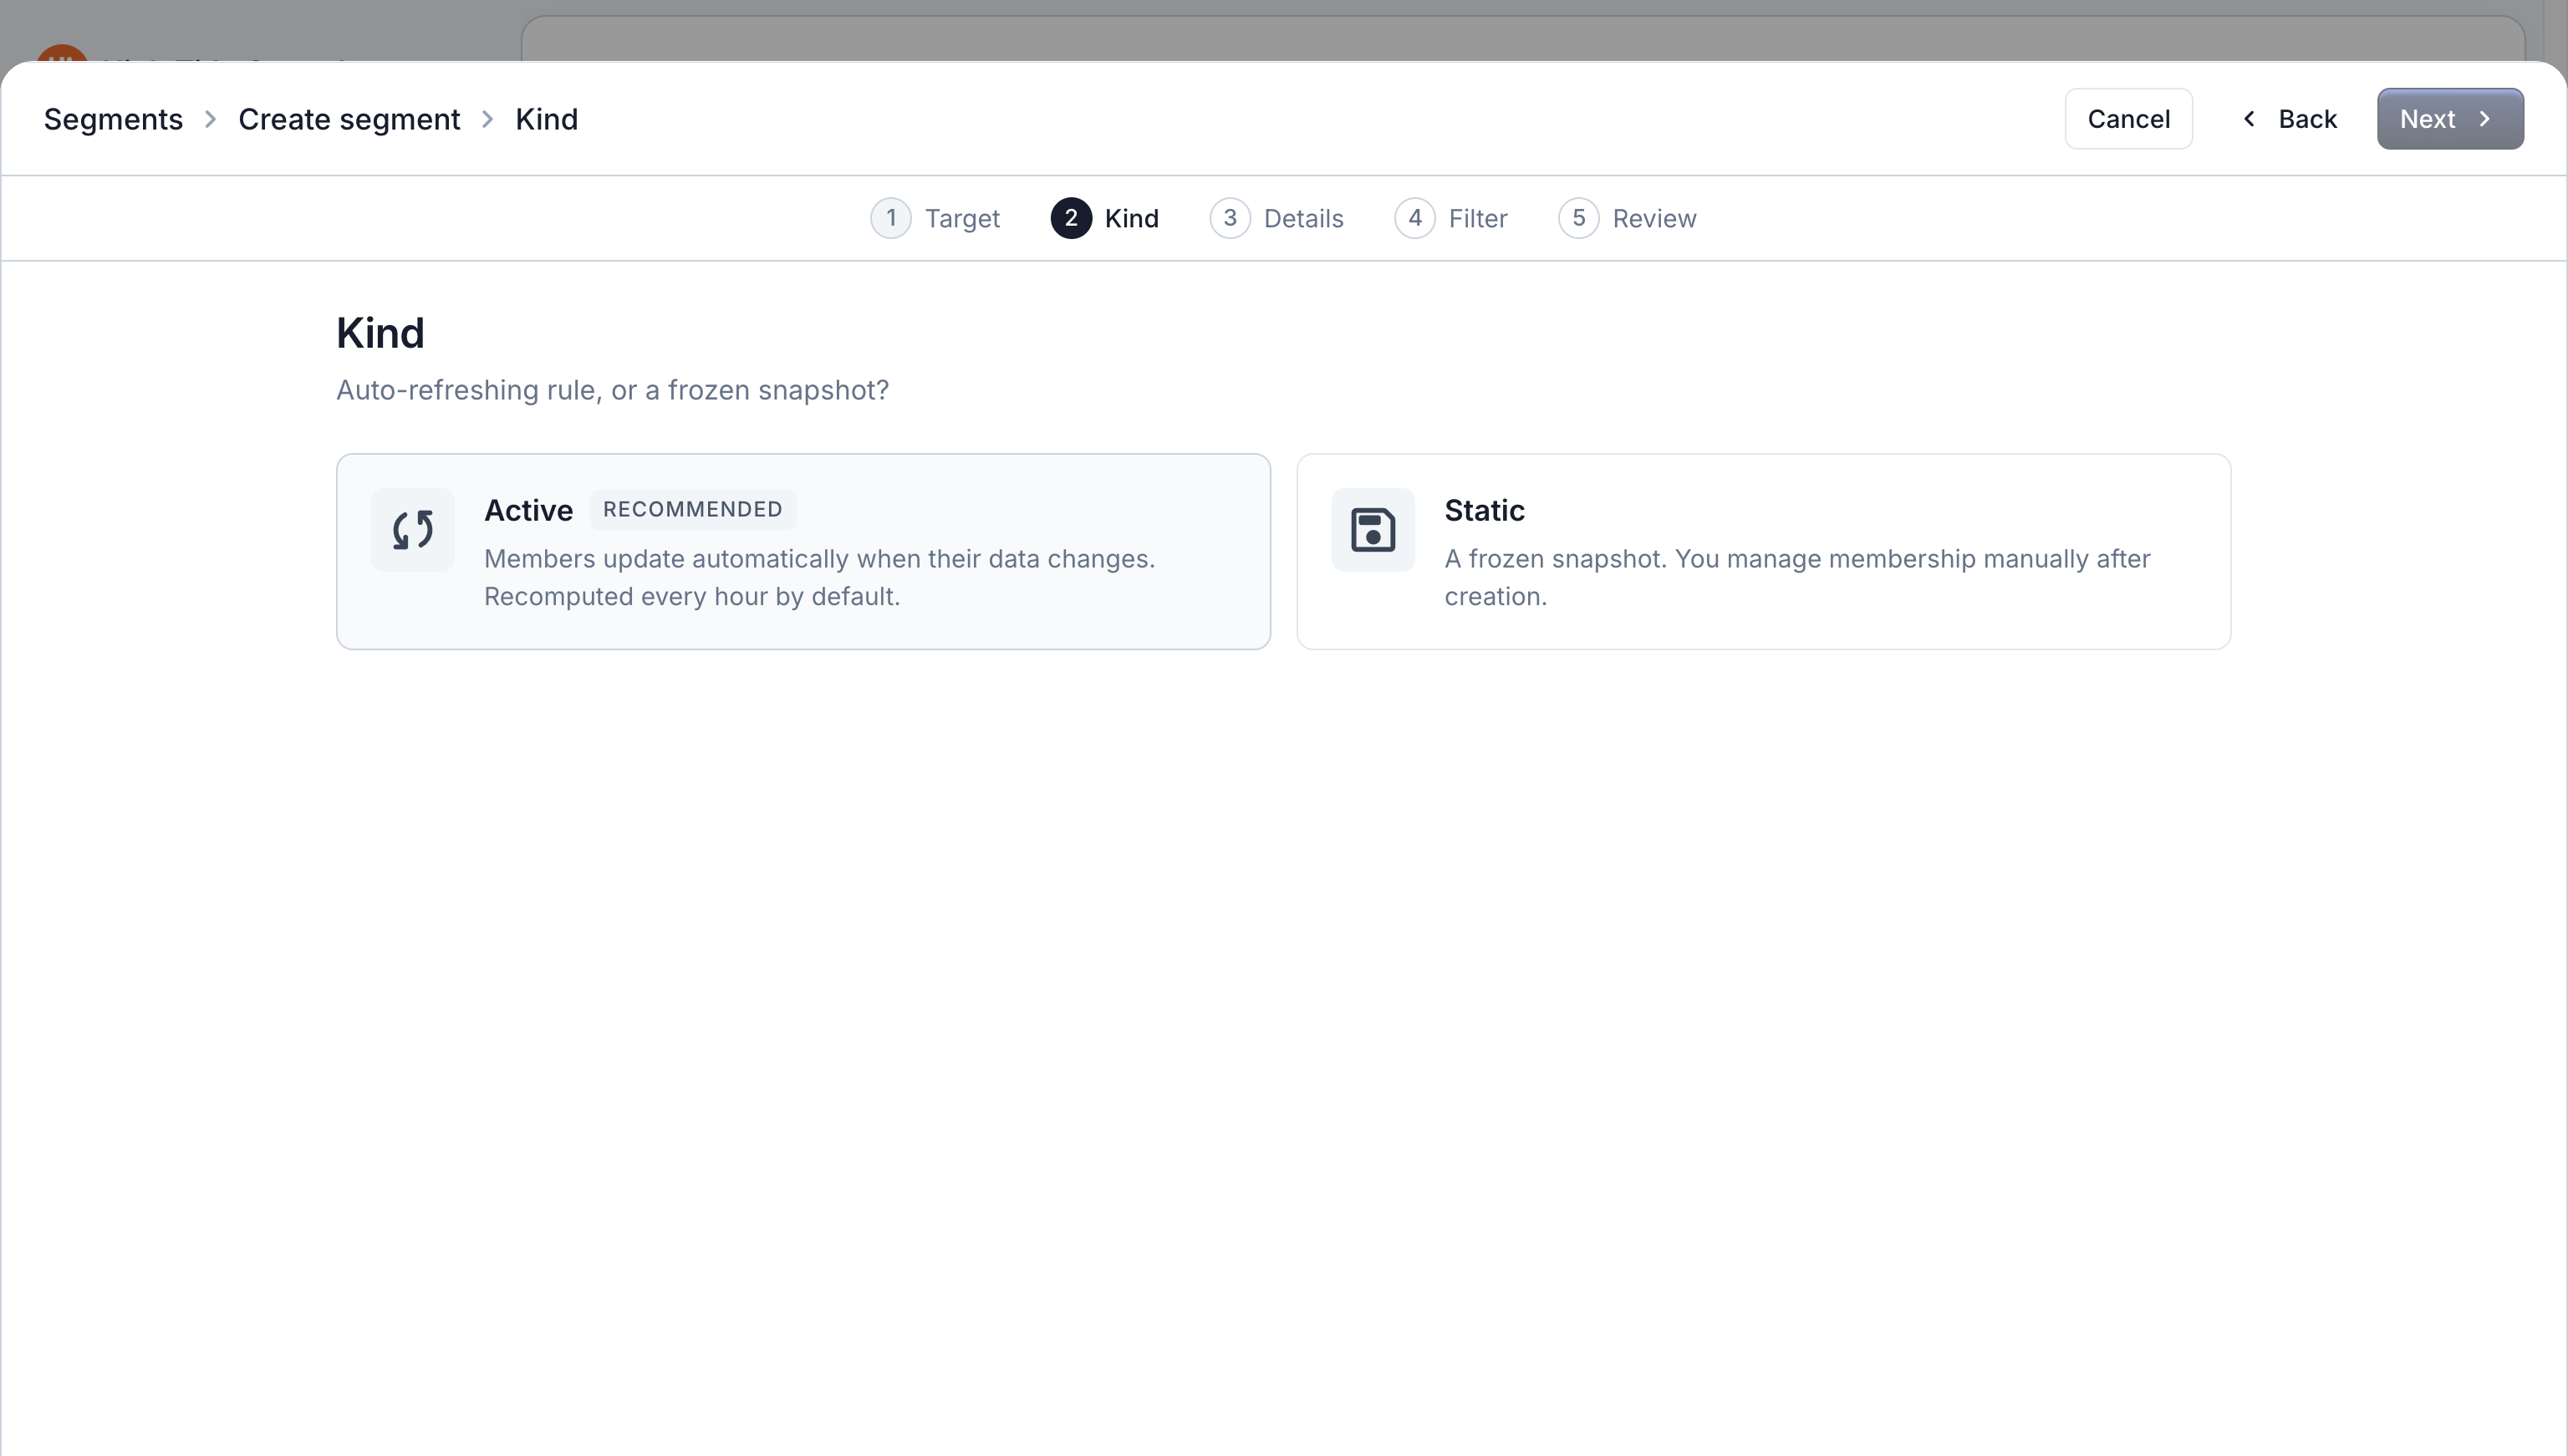
The Kind step asks whether you want an auto-refreshing rule or a frozen snapshot.
- Active (recommended): "Members update automatically when their data changes. Recomputed every hour by default."
- Static: "A frozen snapshot. You manage membership manually after creation."
See Active vs static segments for a full comparison.
4. Add details
- Enter a Name (required), for example
VIP customers. Segment names must be unique. - Optionally add a Description so teammates know what the segment is for.
- Optionally pick a Folder to file it under.
For active segments, Advanced options offers two extra settings:
- Refresh interval (minutes): leave blank to use the workspace default of 60 minutes.
- Track activity: logs when records join or leave the segment, shown later on the segment's Activity tab.
5. Build the filter
The Filter step decides which contacts belong to the segment. The builder is on the left and a live preview is on the right.
- Click Add filter group, then Add filter rule.
- Pick a property (for example Status, Number of Orders, Gross Revenue, attended events, items purchased, or any custom property) and a condition.
- Add more rules or groups as needed:
- Conditions inside a group combine with AND or OR (a per-group toggle).
- The connector chip between groups picks AND or OR for each pair of groups.
- Watch the preview update: Estimated size shows the match count and Sample matches lists example contacts.
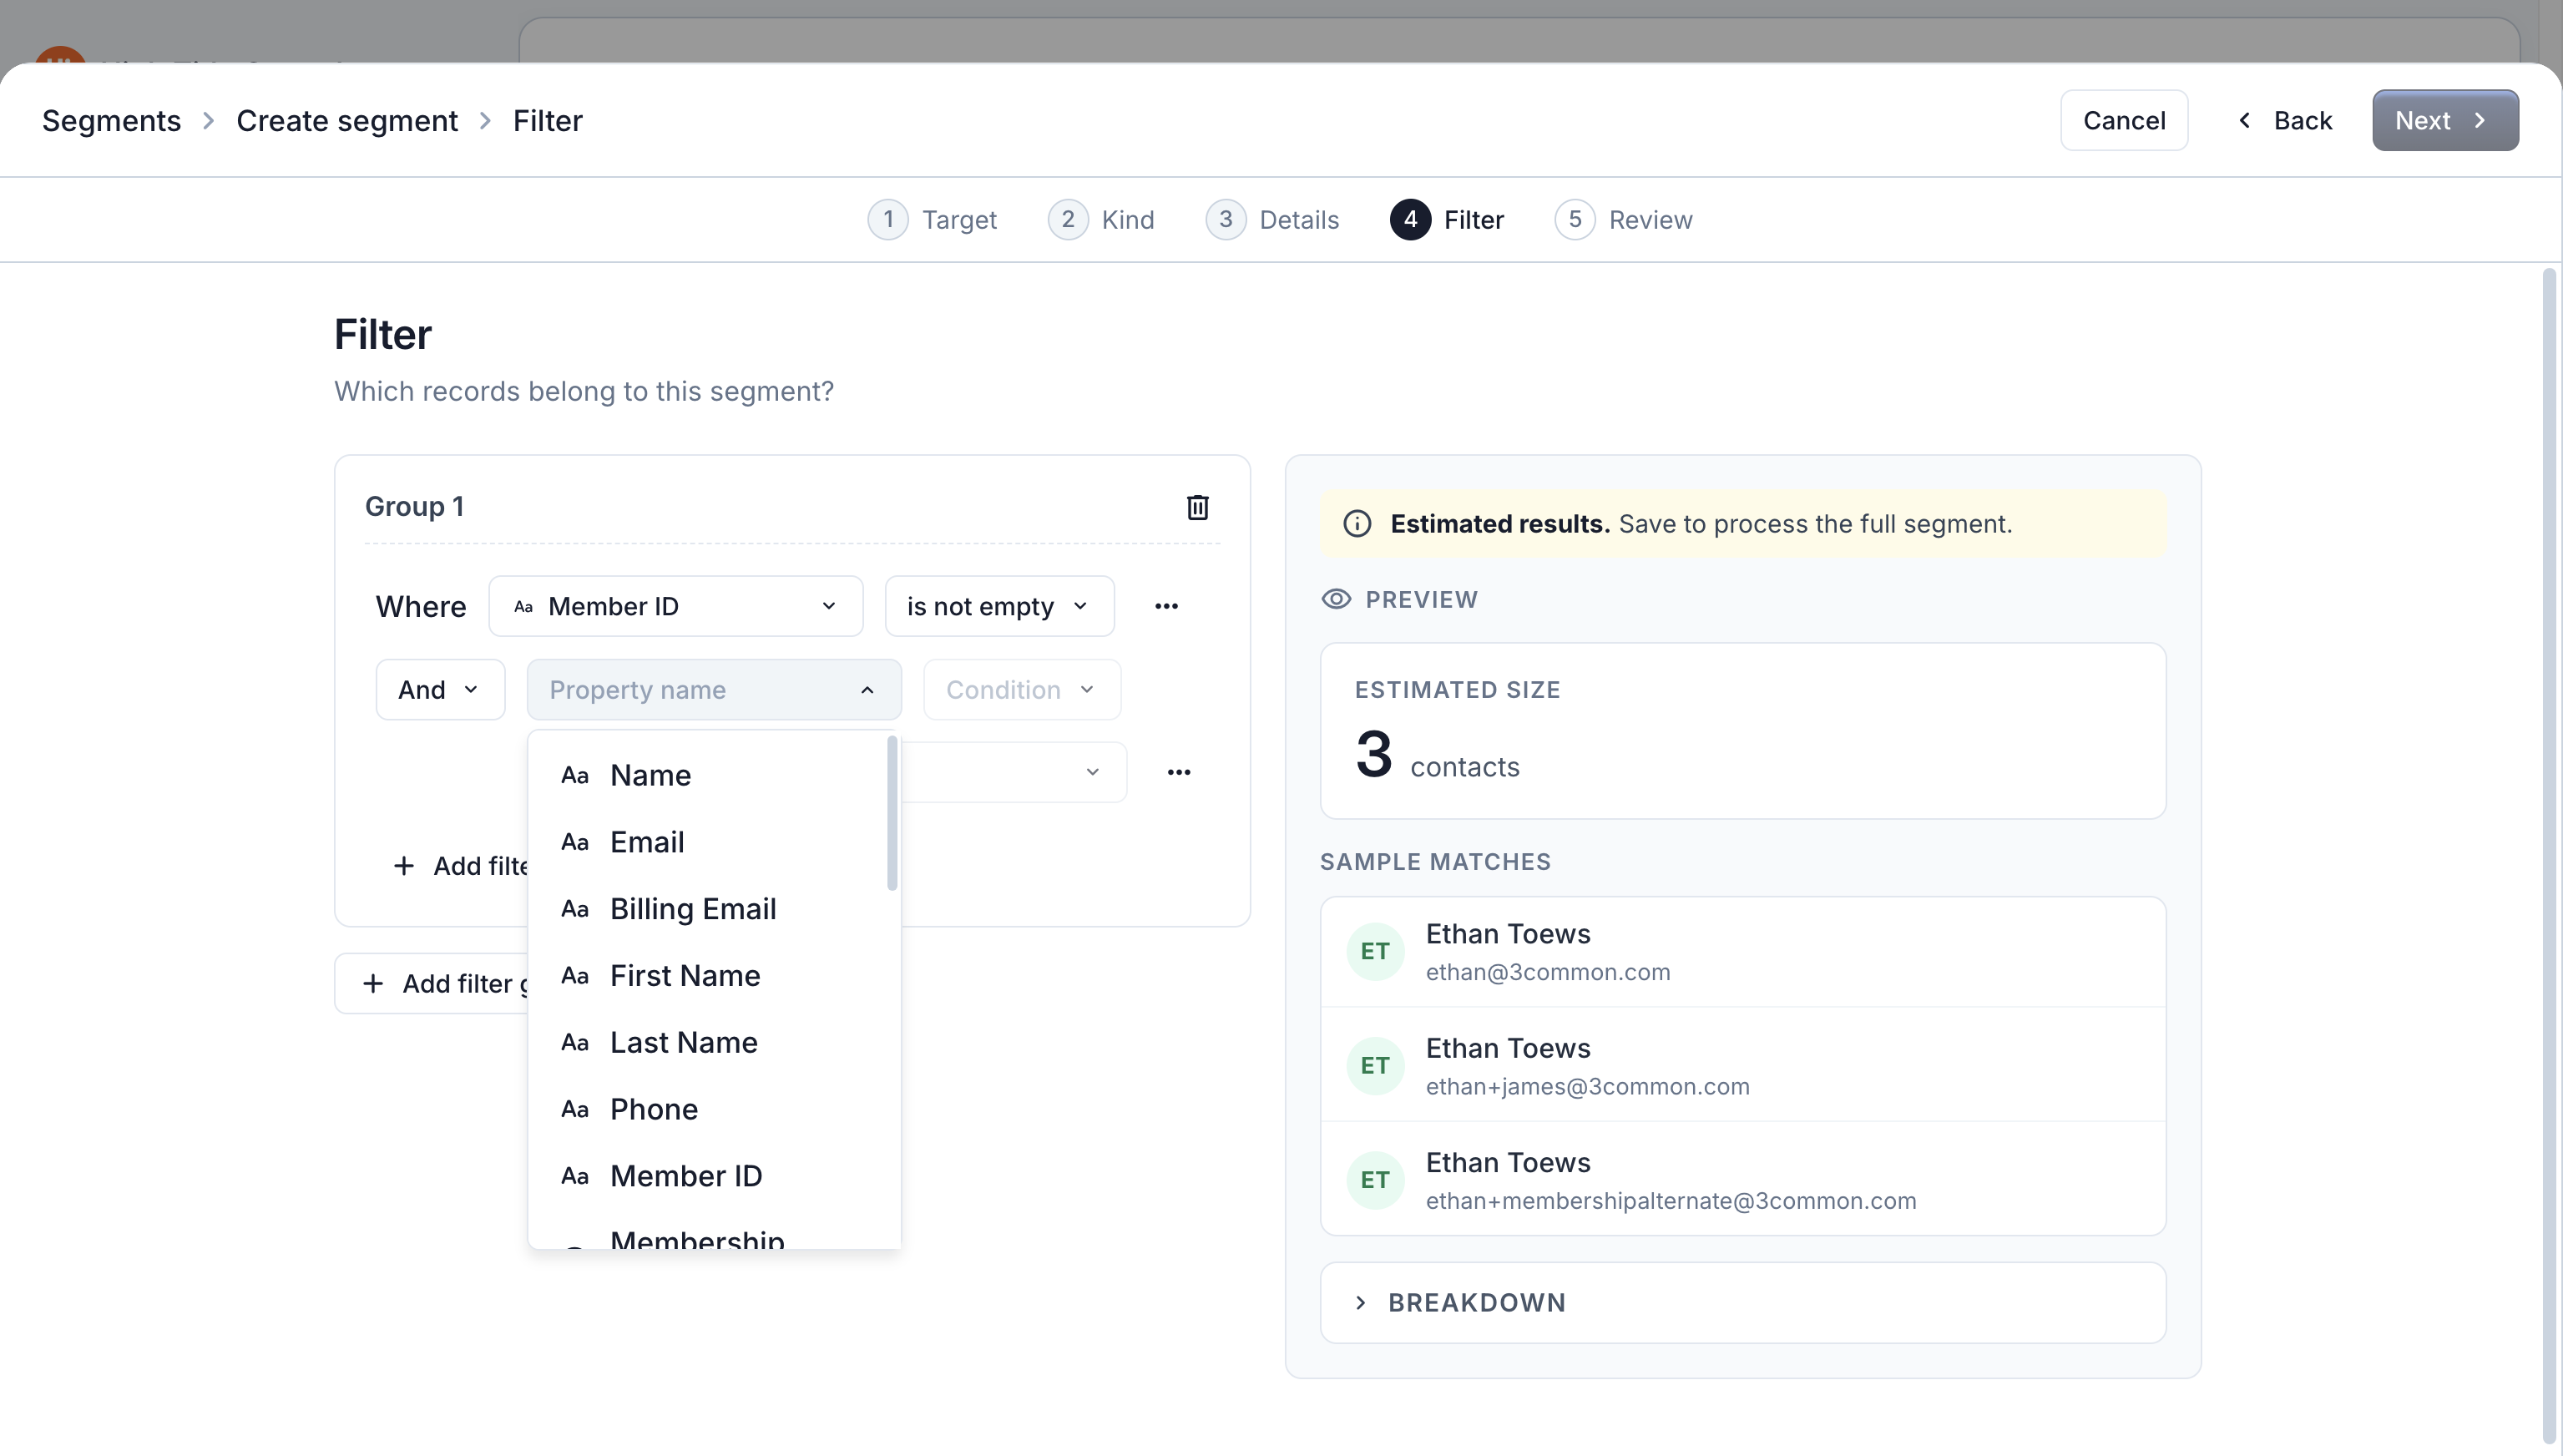
A segment needs at least one filter condition. The preview banner reminds you these are "Estimated results. Save to process the full segment."
6. Review and create
- The Review step summarizes the target, kind, name, folder, and condition count.
- Click Create segment.
- When it finishes you'll see a confirmation with the number of records the first refresh matched, plus View segment and Done buttons.
Drafts survive a refresh
The wizard auto-saves your progress in the browser session. If you refresh or close the tab mid-create, your draft is restored when you reopen the wizard.
Troubleshooting
I get 'A segment with that name already exists'
Segment names are unique across your workspace. Pick a different name, or rename or delete the existing segment first.
The preview shows zero matches
Remove one rule at a time to find the condition that filters everyone out. Check that AND/OR connectors between groups are set the way you intend: AND requires contacts to match both groups.
I can't continue past the Filter step
Every segment needs at least one filter condition. An empty filter would match every record, so it is rejected.